
A game is born
Last week, my partner and I participated in an event for 150+ persons. As part of that event, we had to organize an ice-breaker. At the same time, we didn't have enough space for people to run or change sits while playing because we were at total capacity.
Those restrictions meant that we couldn't just go with our usual alternatives, so after some thought, I decided to make something similar to "100 argentinos dicen" (the argentinian version of Family Feud). In "100 argentinos dicen" contestants are presented with questions, and they must guess what they think is the most popular answer (although not necessarily the right one).
Instead of just copying the game, we simplified it. Questions would be multiple-choice, and the people at the event would cast their vote in real-time using an application. Once the voting finished, contestants would guess which was the most popular option.
The idea was great, so we decided that it would be the game.
Stage 1: Design
After deciding which game we would play, I started thinking about how I would implement it, and I noticed some key features that needed to be in the application:
There were multiple types of users: the players (the persons casting their vote on each question), the admin (the person that would take care of creating the questions and running the game), the host (the person directing the game and that would decide which is the following question to be made to the public), and finally the public dashboard (this is the screen we use to show the current state of the game to the crowd).
The game state needed to live on the server: every player could jump into the game at different moments.
For simplicity, the UI for players would show a splash screen until they need to cast a vote, and once the time to vote is up, the app would show the splash screen again. This user flow has two benefits, on the one hand, it prevents users from making mistakes, and on the other hand, it generates engagement between the crowd and the host.
Since both the public dashboard and the player screen react to state changes, the application needed some form of real-time communication.
Aside from the features mentioned above, there were two additional restrictions:
I only had five days to implement the app.
As a pure front-end developer, I had some doubts about how to implement some of these things.
These led me to the first two major architectural decisions:
I would develop this project in hackathon mode: I would assume the necessary tech debt with the only goal of finishing this project in time.
I would use AWS Amplify: it would still be challenging since I didn't have any experience with AWS or Amplify, but I knew (hoped?) that it would pay off since Amplify is designed to be used by front-end developers.
I started by deciding how to architect the application. For simplicity, I would have one application with multiple pages, one for each type of user described above. Each screen would be as simple as possible:
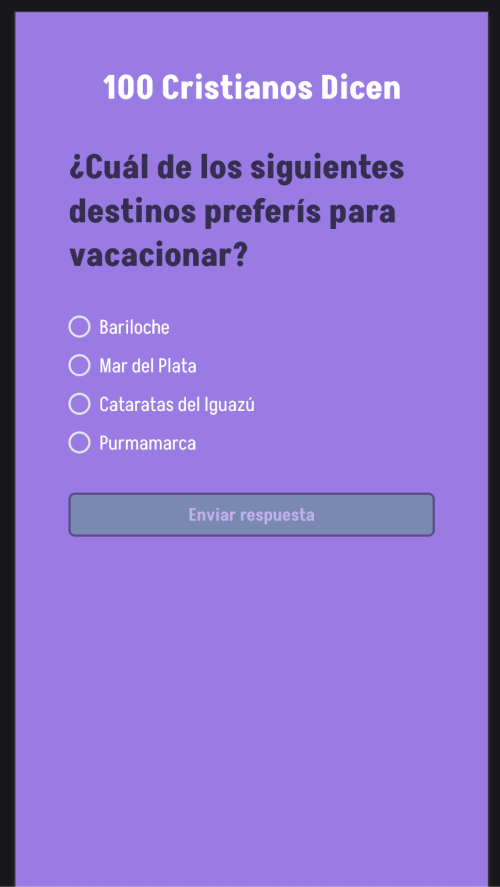
Player screen: it would show a splash screen by default. The UI will then change into a simple form using radio buttons to select the correct choice when a question becomes active. The user can submit their question by clicking a button, after which the UI goes back to the default state.
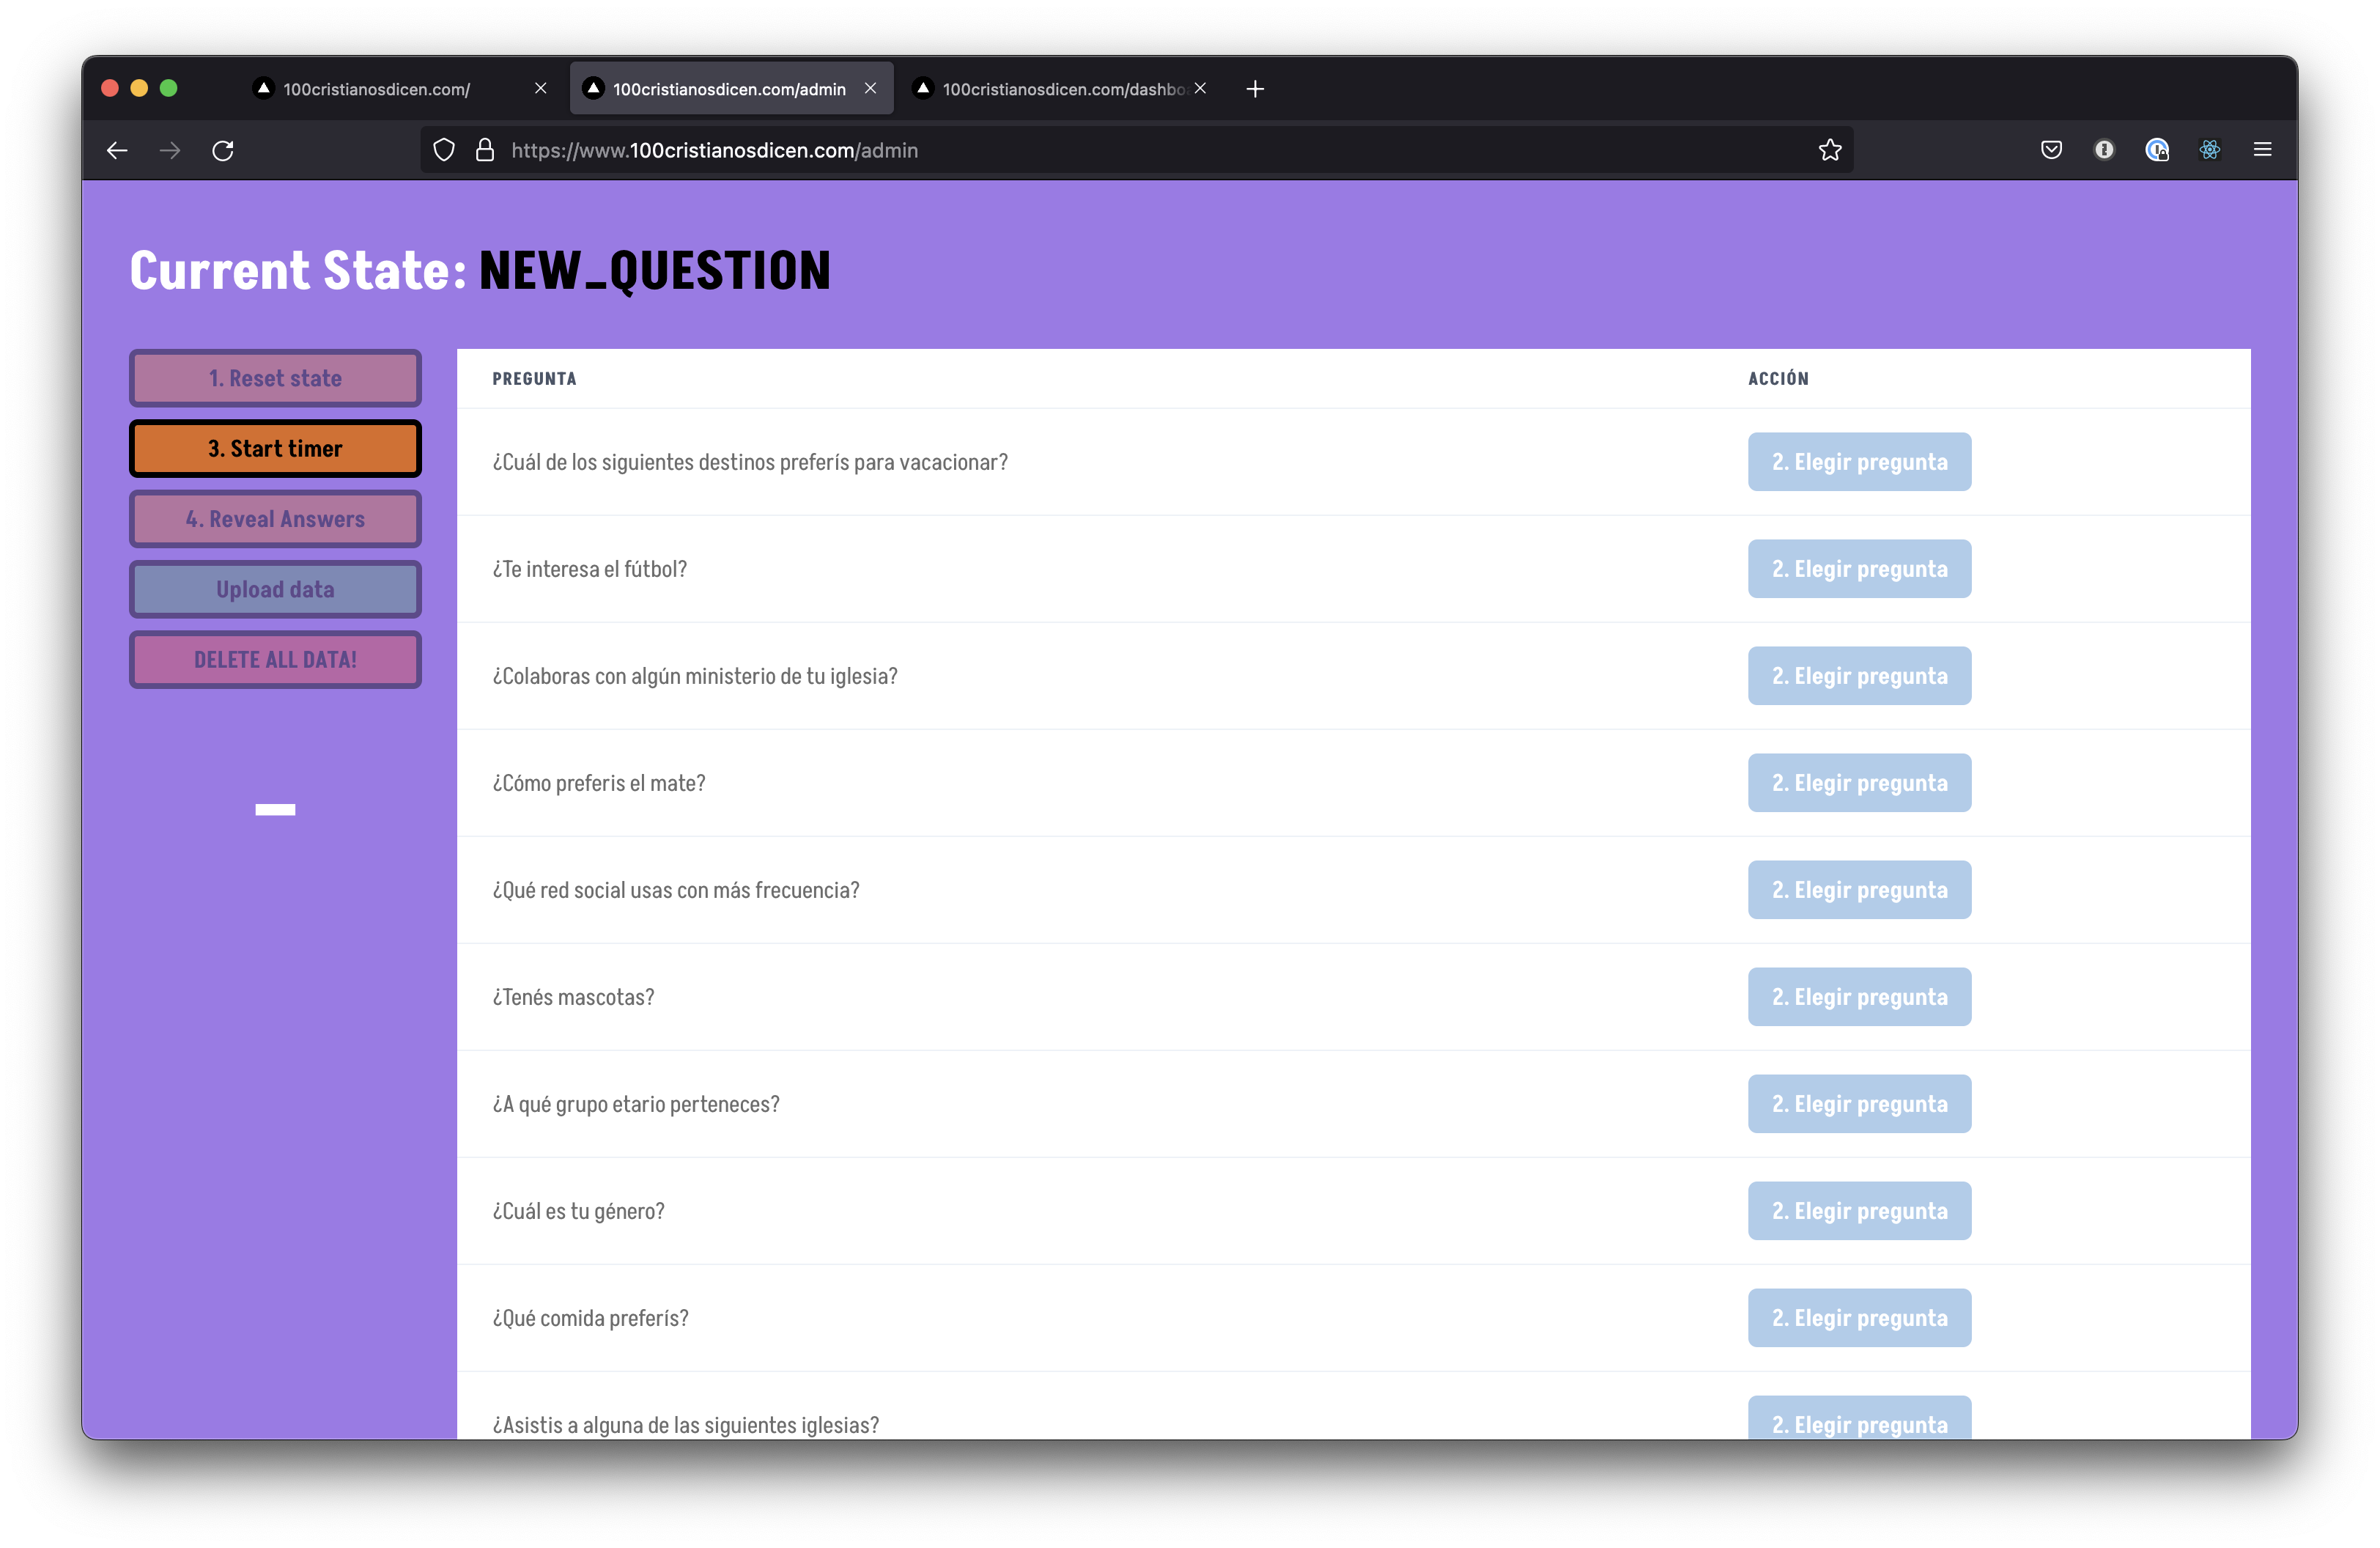
Host screen: shows the list of questions. The host can select a question by clicking a button next to it, after which the buttons are disabled until the host can choose a question again.
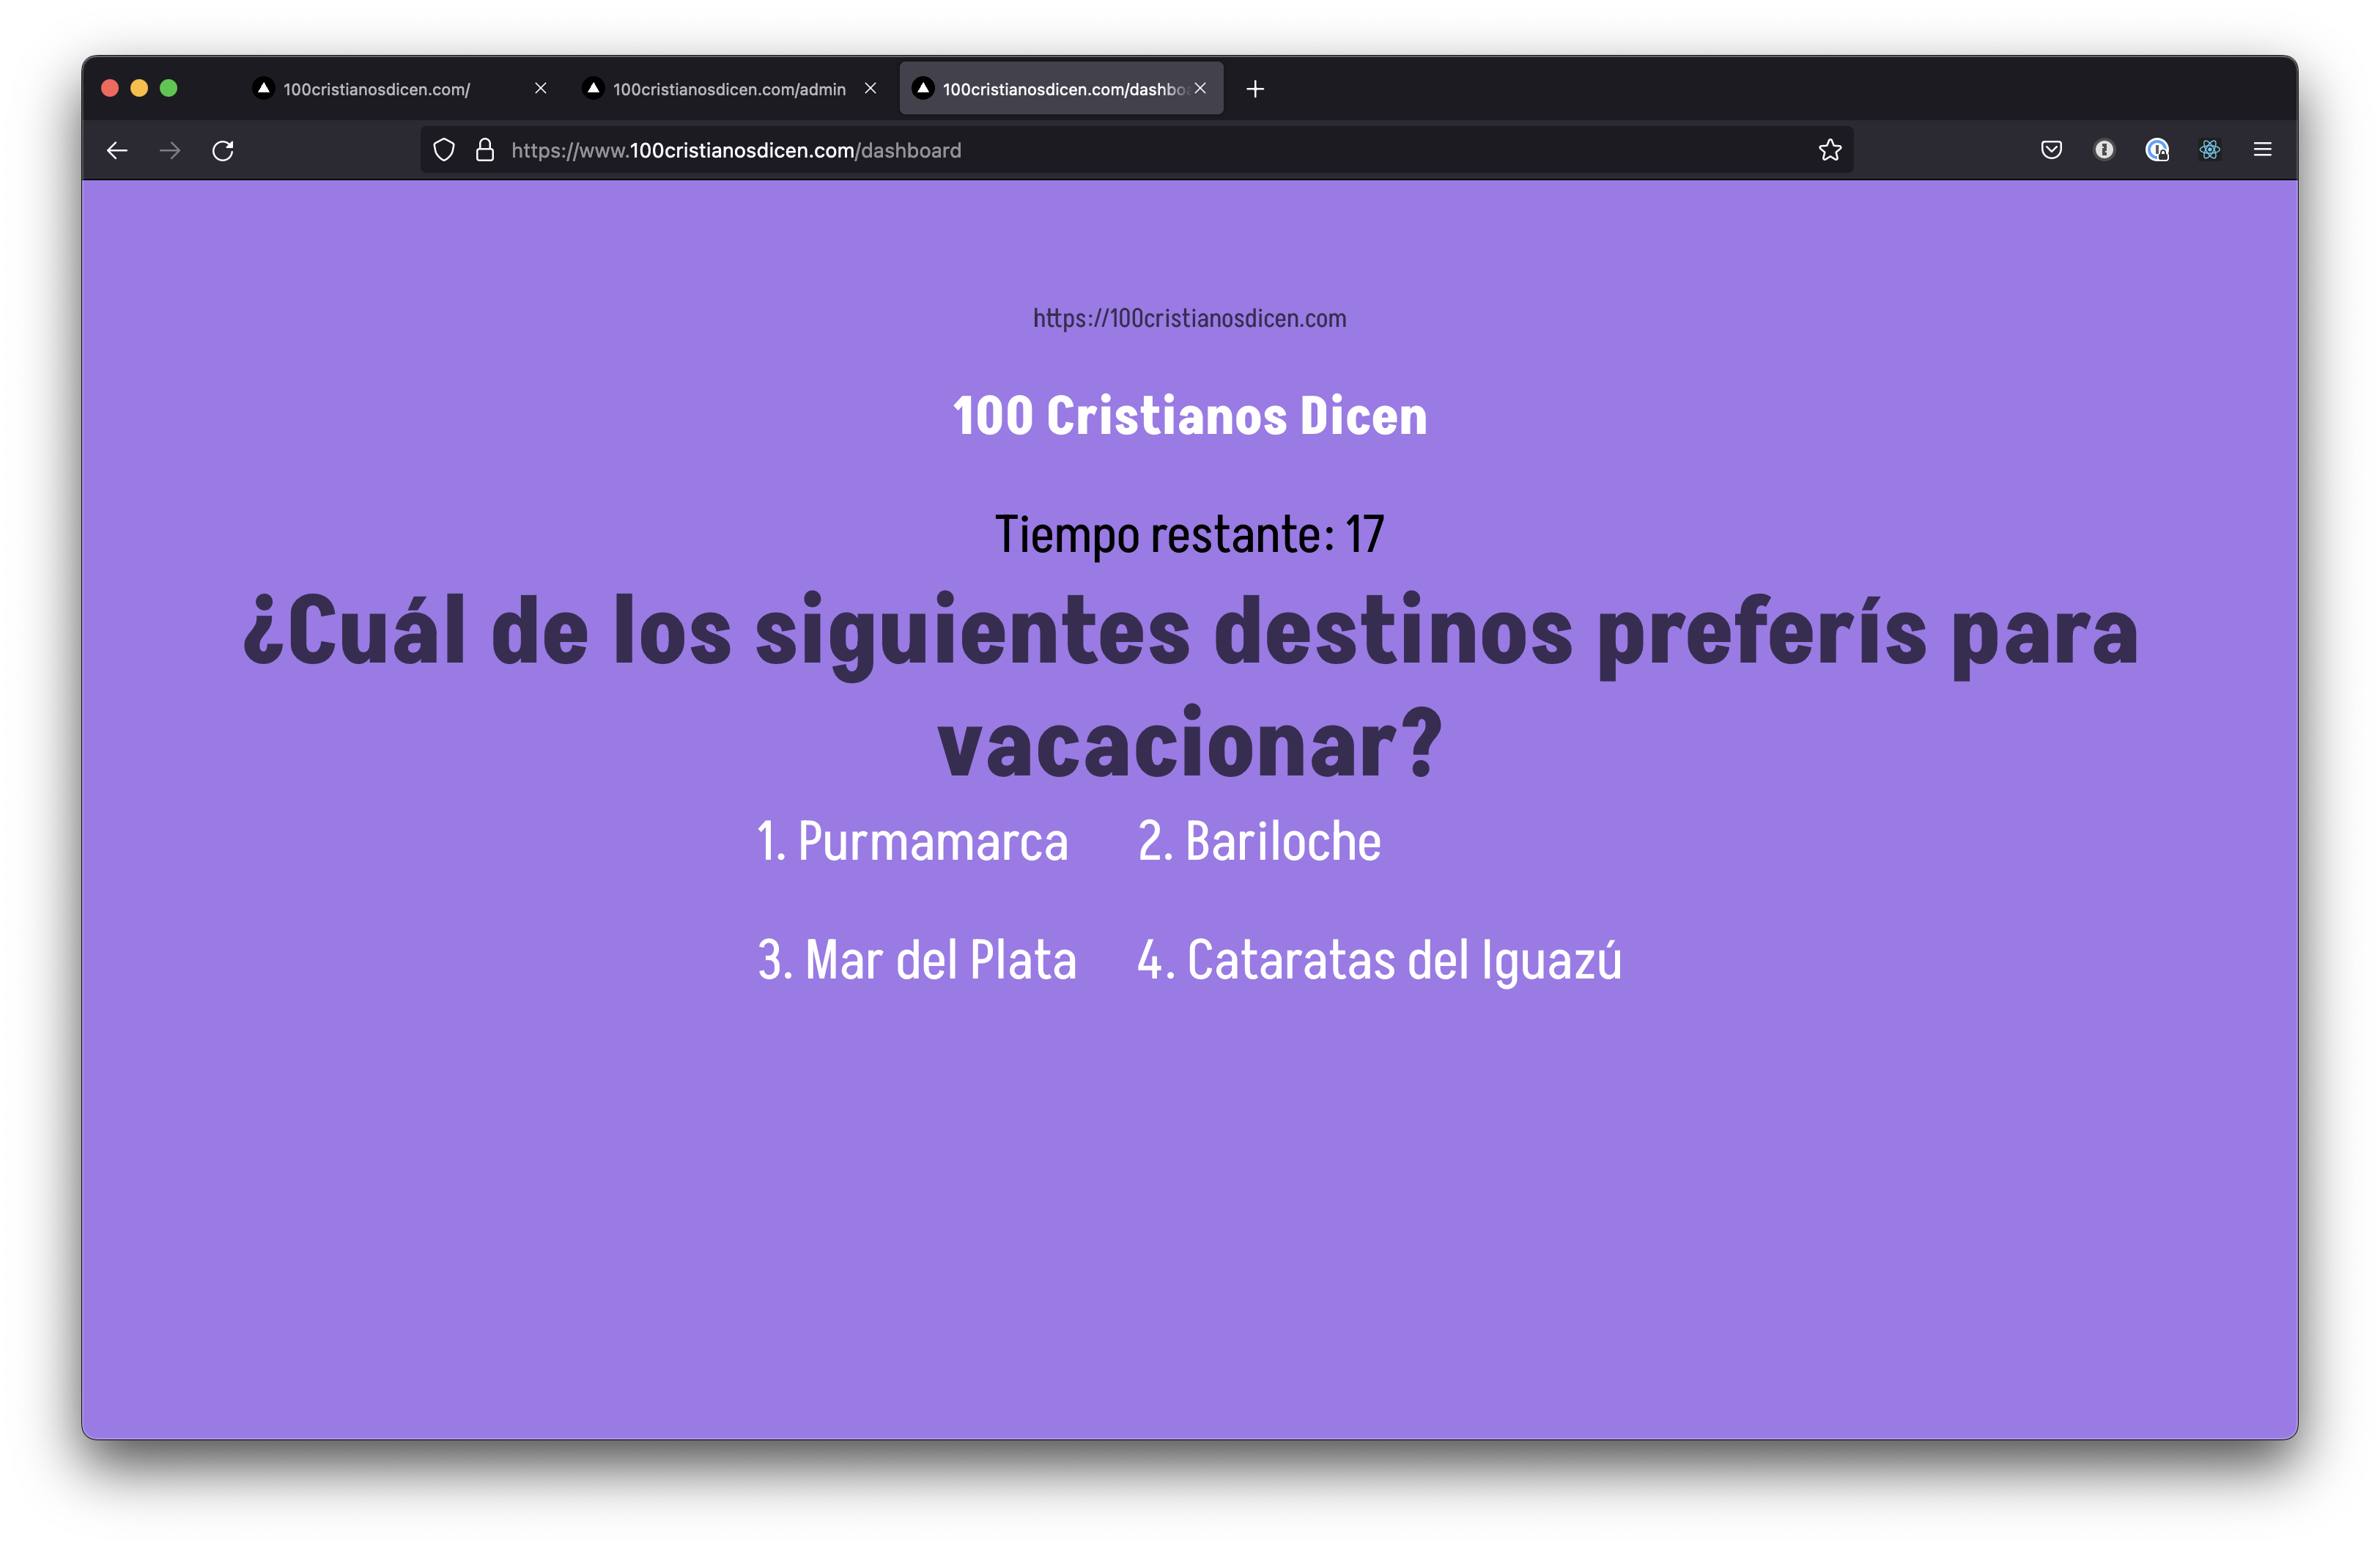
Public dashboard screen: the crowd and the host will see this screen at all times. It will show different things depending on the state of the game: a splash screen, the current question text, a timer, and the voting results.
Admin screen: the admin will have complete control of the game. They will be able to select a question, start the timer, reveal the results, and go back to the splash screen again.
Then I designed some state diagrams to model the game state and each screen. Below you can find the finite state machine that models the game state:
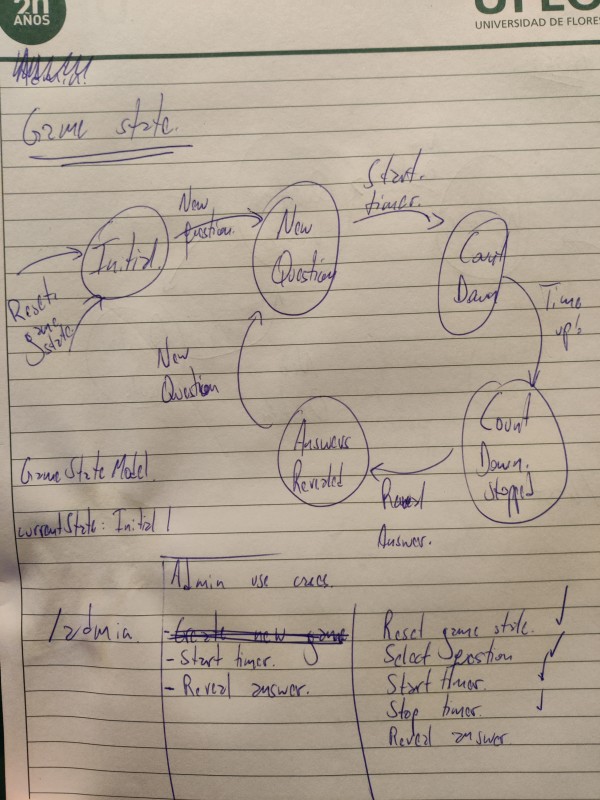
All these took 2 to 3 hours, but it was the best decision since it would be my map during the next couple of days.
Stage 2: Let the coding begin
Before starting with the coding part, I took some time to read the AWS Amplify Doc. I began with the Getting started section to set up my AWS Amplify project, then continued with the GraphQL API Docs, with particular attention to the Data modeling to understand how to model the data.
After finishing this small research, I bootstrapped a NextJS application and created an Amplify app. The next step was creating a GraphQL API and defining the data model for my application.
In AWS Amplify, the data model is defined through the GraphQL schema. Decorating a type with the @model directive will create a DynamoDB table for it. Aside from the @model directive, there are other directives such as @hasOne, @hasMany, @belongsTo, and @manyToMany. Below you can find the application model (or you can check it from the repo):
type GameState @model {
  id: ID! @primaryKey
  currentState: GameStatus!
  currentQuestionId: ID
  targetTimerEnd: String
}

enum GameStatus {
  INITIAL
  NEW_QUESTION
  COUNT_DOWN_INITIATED
  COUNT_DOWN_STOPPED
  ANSWERS_REVEALED
}

type Question @model {
  id: ID! @primaryKey
  publicQuestion: String!
  personalQuestion: String!
  options: [Option!]! @hasMany
}

type Option @model {
  id: ID! @primaryKey
  order: Int!
  text: String!
  question: Question! @belongsTo
}

type Response @model {
  selectedOptionId: ID! @primaryKey(sortKeyFields: ["questionId", "playerId"])
  playerId: ID!
  questionId: ID! @index(name: "byQuestionId", queryField: "questionResponses")
}

type Player @model {
  id: ID! @primaryKey
  name: String!
  responses: [Response!]! @hasMany
}
Amplify will use the schema above to create the DynamoDB tables, resolvers for multiple queries and mutations, and generate Typescript types.
The next step was setting up the API client. Following the tutorial, I decided to use the aws-amplify js client. The client includes helpers to create queries, mutations, and subscriptions. Then, I made some functions to encode the application business logic using those helpers. Aside from the queries and mutation, I added a hook to create a GraphQL subscription to what the game state. Every page uses this subscription to listen to the game state in real-time.
With the backend in place and the business logic completed, I started coding each page. The pages were the most straightforward part since I decided to use NextJS and Chakra UI to speed up the development. Here are a couple of pictures of the UI:
The final details involved buying a domain using Route 53 and configuring it to point to my application. Luckily, this was super easy, thanks to the Amplify console.
Conclusion
So, after all this work, did I learn something? The answer is obviously yes!
I had a crash course on AWS Amplify 😅
Amplify sped up my development, especially on the backend side
But, the real question is if I would do something different:
Instead of using aws-amplify as a client, I should've probably used a more standard client like Apollo or Urql, which includes hooks and cache management.
Ideally, we should move the business logic to the server, although this would have taken me more time.
The GraphQL subscription was enough to support the real-time communication, but I have the feeling that sometimes the connection would break and end up in a bad state. I could consider using a service like Pusher or Ably.
Anyway, I hope you found this interesting. You can check the application code here: https://github.com/surbina/family-feud. If you have any doubts or questions, you can reach out to me on Twitter. See you next time Space Cowboy!
Cover image: "IMGP0100 - beer cap trivia" by RaeAllen is marked with CC BY-NC-SA 2.0.